
Hi,
Hope you are enjoying the project – Seed to Seed as much as we are enjoying doing it . The whole idea of this project is to create an awareness of dal/lentil – a food so cheap, yet so nourishing.
This episode is about Urad dal/ white lentil.

Urad dal is available in the market in three forms: Whole with the skin, split with the skin and split without the skin.
The whole dal with the skin is known as Sabut Urad in Hindi and Black gram in English. The split dal with the skin is known as Chilka urad in Hindi and split black gram in English.
Skinned and split urad dal in Hindi is known as White lentil in English.
Sabut Urad/ Black gram fulfils all the criteria of a seed. The black shiny skin is its coat, the two white pieces which we call dal are the cotyledons and the embryo is in between the two cotyledons. The embryo is the dormant tiny plant within the seed.
When we split the Black gram, the embryo gets destroyed, so we cannot get a plant out of a split gram.
Urad dal is a winter crop. We started our project Seed to Seed just before Monsoon. So let’s see how far we can go.
With this idea we started the experiment 1.
Experiment 1

We prepared a pot and soaked few Black grams for about 4 hours and then sowed the seeds 2 cms below the soil and watered it sparingly.
The reason for soaking the seeds was to hasten the process of germinating. Otherwise the seeds will have to absorb the water from the soil and that will take a long time.
And keep watching the pot as the seeds grew ….

For the first couple of days there were no sign of the seeds in the pot.

On 4th day few cotyledons emerged from the soil.
After sowing the black gram seeds, for three days there was nothing visible on the surface of the soil, as if the seeds were quietly sleeping cosily inside the soft soil. But it was not so. They were busy undergoing different stages of germination.
To show you the above process, we did the second experiment as follows.
Experiment 2

On 1st day we soaked a few Black grams for about 4 hours. In the mean time we filled up a drinking glass with soil to 2 cm from the brim of the glass. Moisten the soil by lightly spraying water. Placed the soaked Black gram close to the side touching the glass surface and filled up the glass with the remaining soil.
On 2nd day, visually there was no change. The cotyledons absorbed more moisture from the soil and swelled up. Their coats burst open and the tiny plants (embryos) became active.
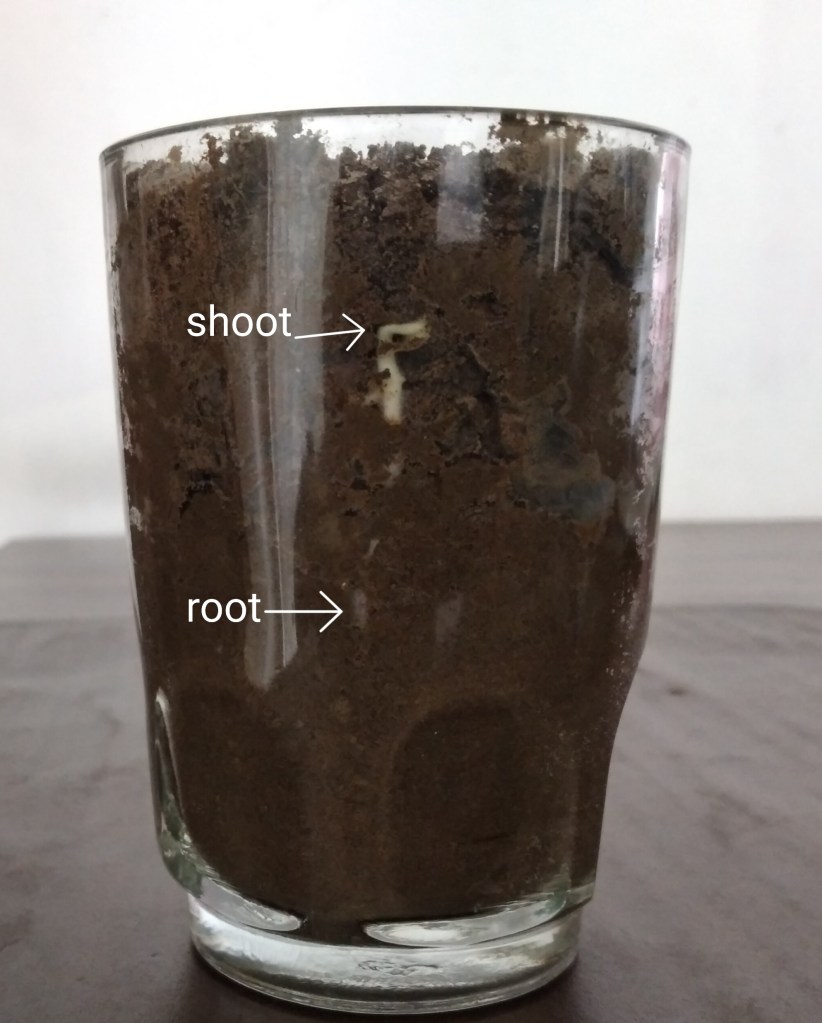
On 3rd day the roots and the tiny shoots were visible. Roots were the first to come out of the seeds. So the root is longer than the shoot. The root went down in search of water and the shoot went up in search of sunlight.

On 4th day the root went deeper into the soil and the shoot went up with its cotyledons almost reaching the top soil.
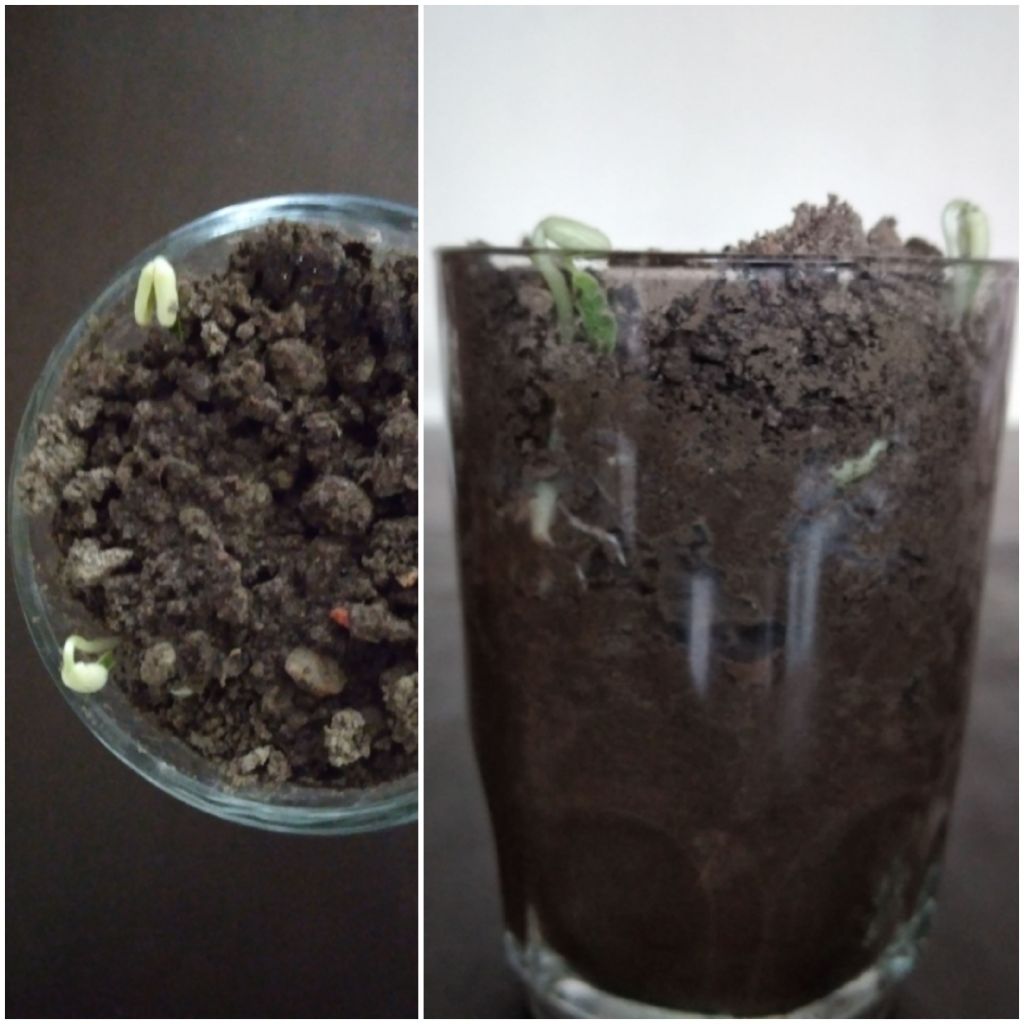
On that same day by evening the cotyledons emerged to the surface of the soil (as seen in the first picture)
In the 2nd picture from the side of the glass a tiny stem, with the cotyledons and a pair of green leaves were seen.
The same thing happened to the seeds in the pot. Now let us come back to the Exeriment: 1
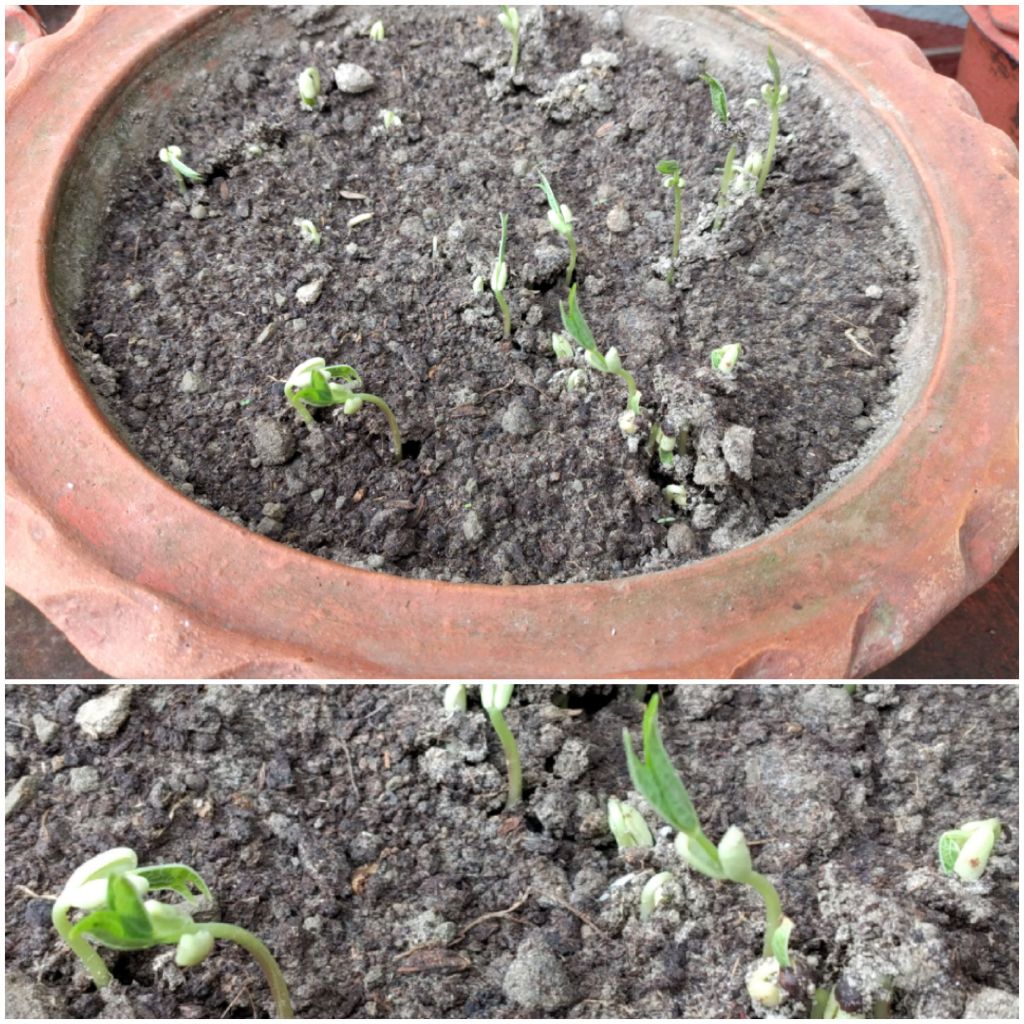
On 4th day, few cotyledons emerged from the soil and behave like leaves providing food for the growing plants. So they are called seed leaves. Such germinations are known as epigeal germination.
The bottom picture is the enlarged view of the top picture. Along with the cotyledons green leaves are also seen emerging from the cotyledons.
The first pair of green leaves is called true leaves. The function of the seed leaves continue for sometimes even after the true leaves appear. With the true leaves the plants grow very fast.

The true leaves have become big, but the cotyledons were still hanging on to the plants. Some believe the cotyledons should be removed once the true leaves appear.

Within a week small stem buds are noticed in between the true leaves followed by leaf buds.

When the leaves became prominent it was found that the leafstalk had 3 leaflets instead of one leaf.
When a leafstalk has more than 1 leaf than the leaf is compound leaf. So urad plants have compound leaves.
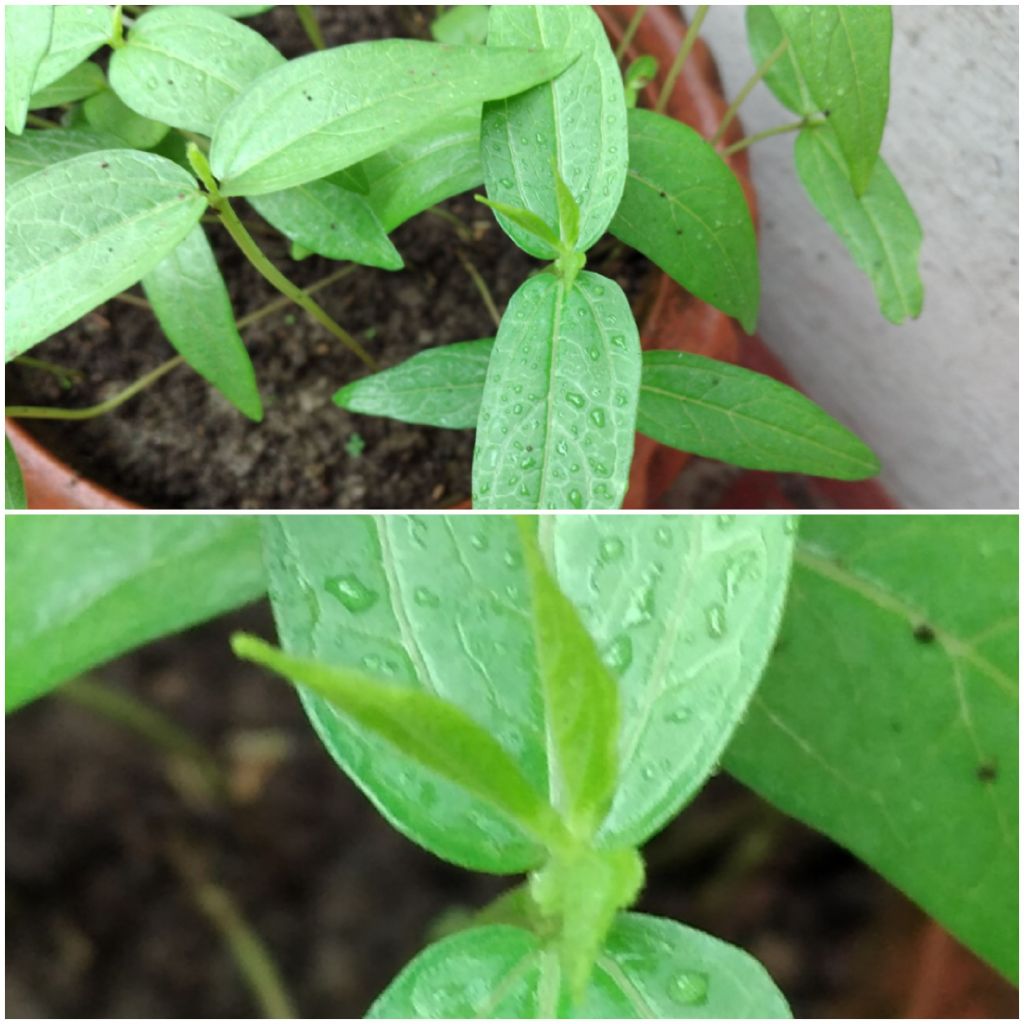
Enlarged version of the compound leaf.
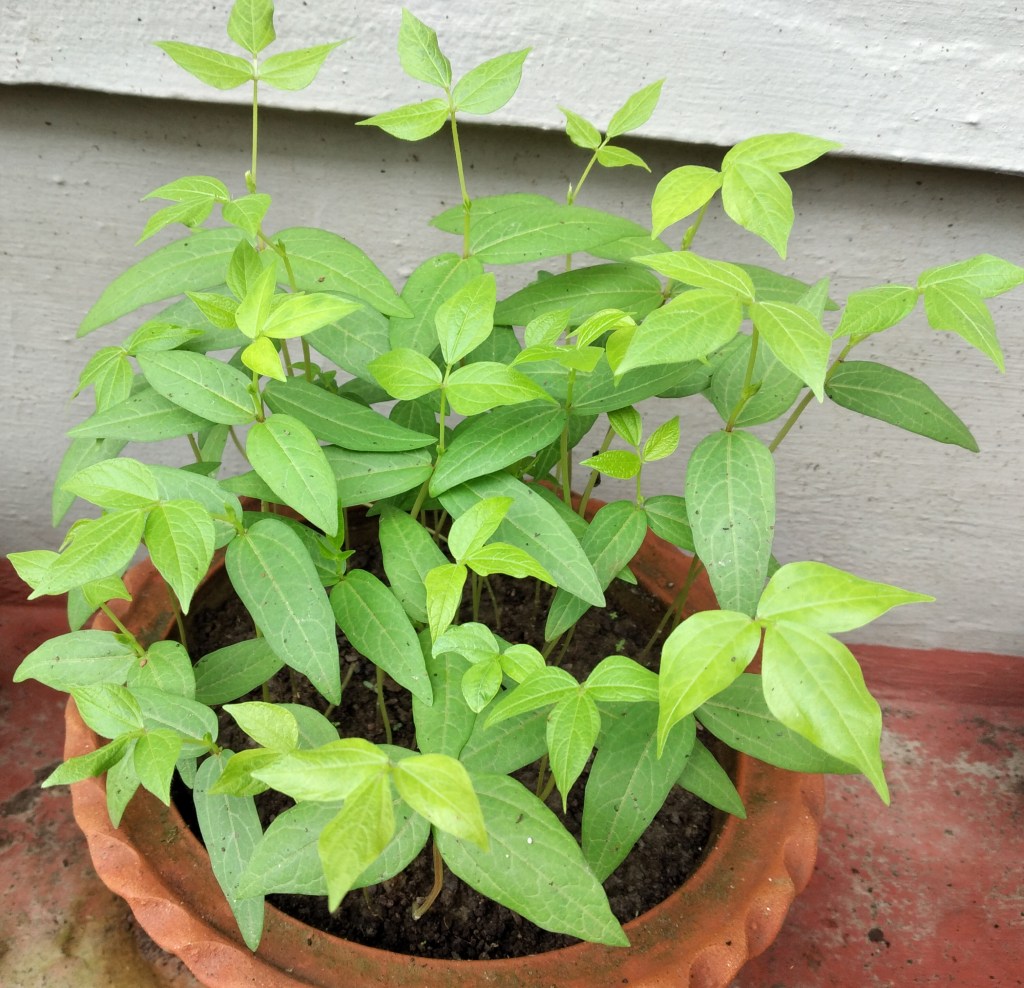
A couple of days later the 3 leaflets were noticed in every plant.
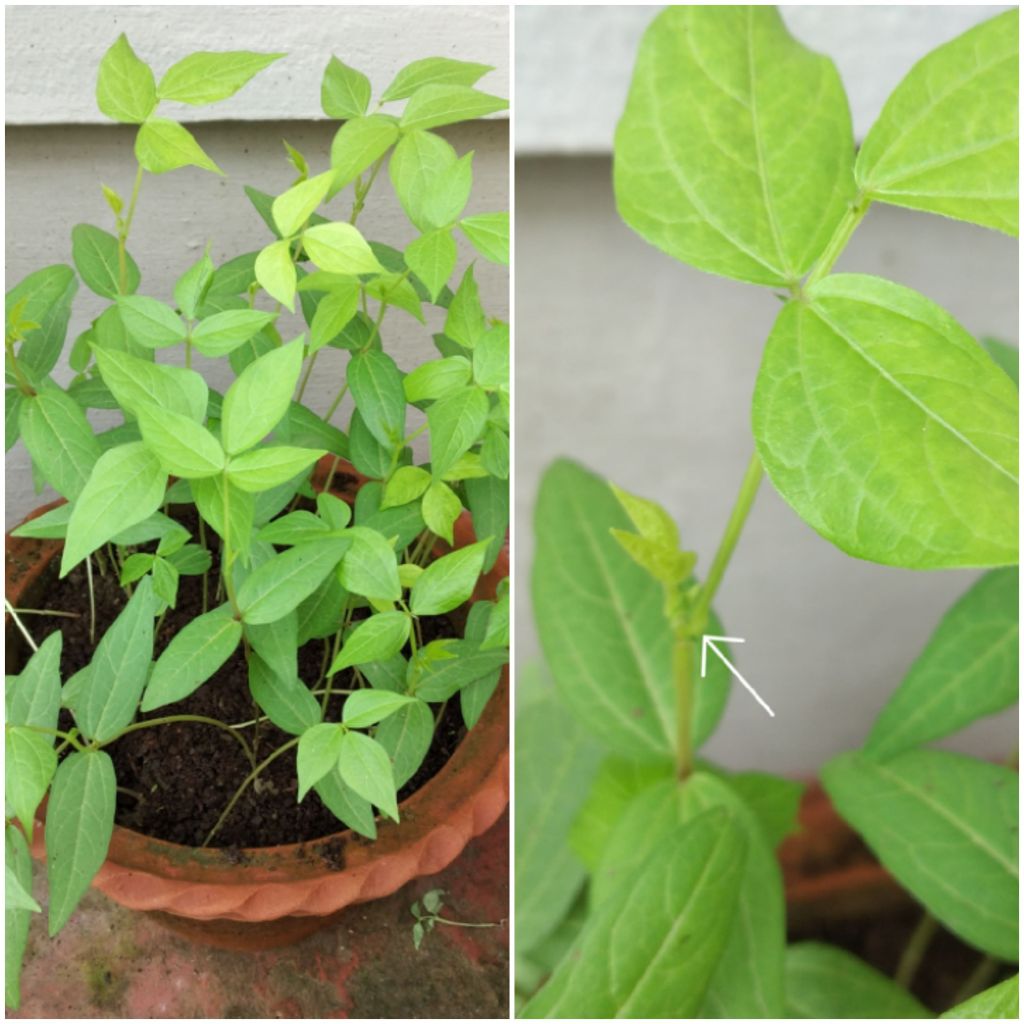
As the stem and the compound leaf became bigger another leaf and another stem bud came out from the base of the first leafstalk and stem. In this way one after another leaves grew on the plants.
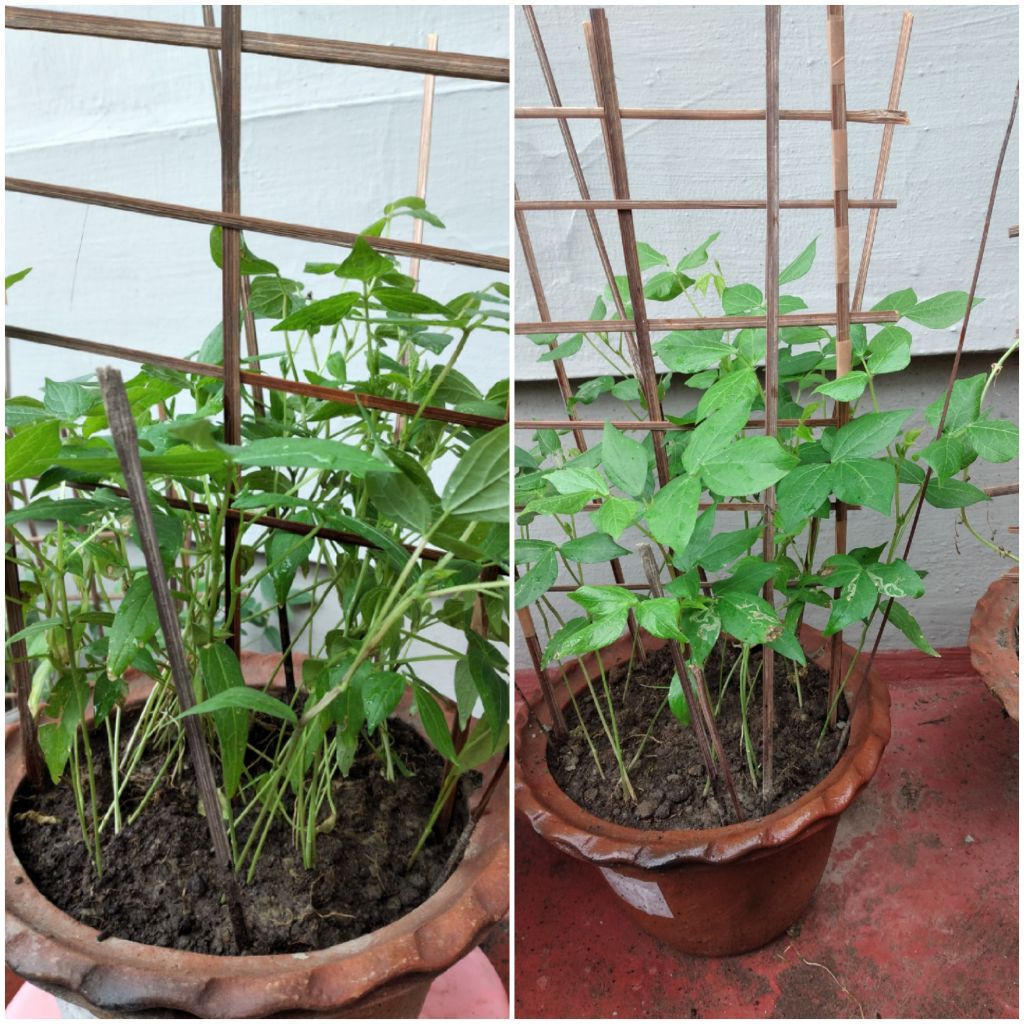
When the plants were about 45 days old the pot became quite crowded. We weeded out few plants to enable the remaining to grow freely. The plants were about 37 cm tall.

There was not much change in the heights of the plants but they definitely looked healthier than before. The plants could not stand up straight. So we made a bamboo support near them. The plants never tried to use the support. We weaved the end of the plants in and out.

The plants grew taller with the new leaves and new branches. The branches grew from the space in between the stem and the leafstalk as shown in the picture.
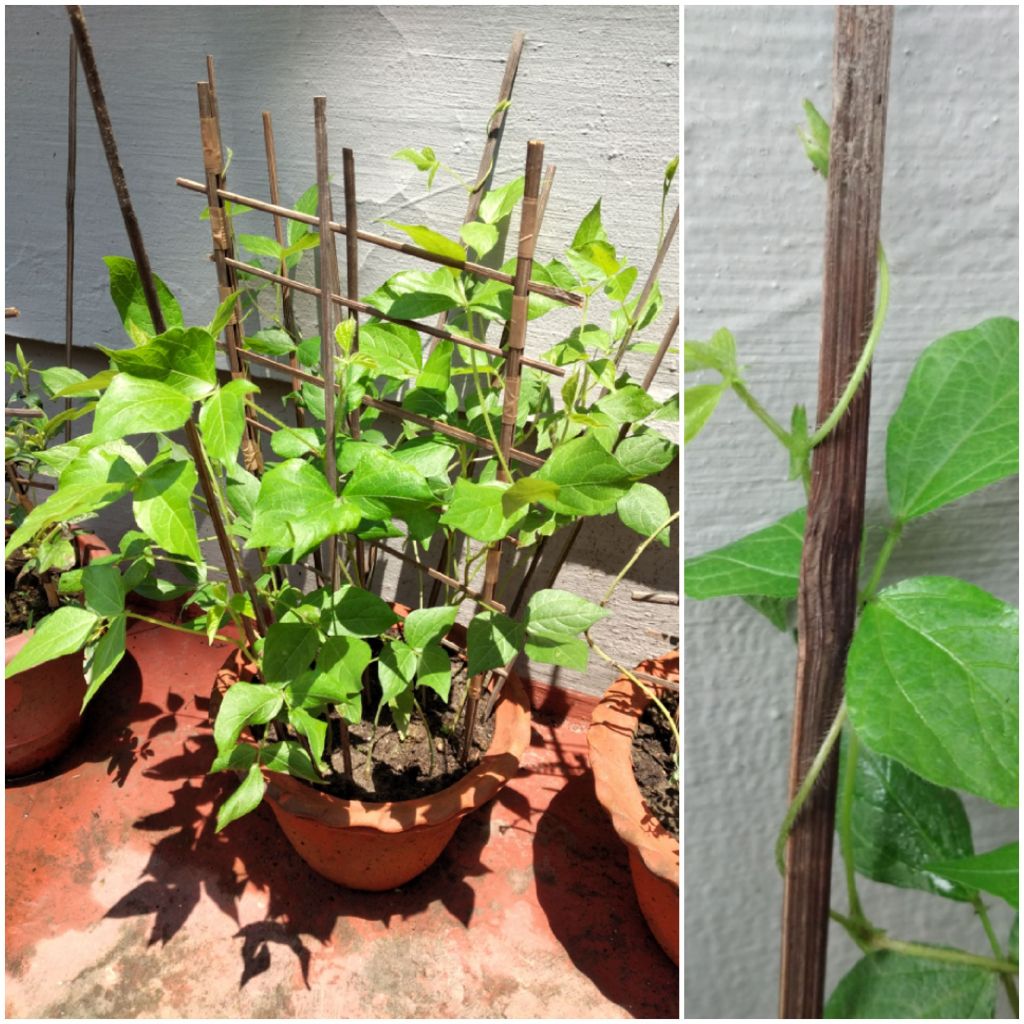
One morning we noticed that the ends of the plants were behaving like tendrils. They were trying to climb up the bamboo supports. By that time the plants were about 60 days old.

The plants began to grow fast.
We had to extend the bamboo sticks.

In the morning sunlight, the end of the plant looked gorgeous. The fine hair at the end of every plant shone brightly. The leaves looked fresh and healthy.

The thin bamboo sticks could no longer hold the weight of the plants. We made extra support on top taking help of the wall.

They grew so fast that we had to soon transfer the plants to a larger trough. We broke the pot carefully. The roots took the shape of the pot. There were no sign of soil and the roots were completely dry. We planted the plants without disturbing the roots and made a bamboo support again for the plants to climb.

The plants began to grow further. Leaves looked healthier and stronger.
The plants completed 90 days.

By now the plants completed more than 120 days. The brightness of the plants faded. There were no sign of flowers. Leaves turned yellow and began to dry up.
We are happy that we could show you the beautiful urad dal plant and its leaves.
Urad dal is a winter crop. So we will try again in winter.
Till then ……….

Very meticulous! Good photography too! Hope to read more….
LikeLike
You amaze me….too good…experiential knowledge is making it very interesting.
LikeLike
Very interesting and educative.I am very fond of DAL ( or Dail, as we call it), but did not know so much about it before. The presentation is very innovative and narration is very lucid. Congratulations to the author.
LikeLike
Great job ! Unusual exotic ALL NATURAL coloured baking of bread!! Yet to see even in the world over.
*CONGRATULATION!* Indira
LikeLike
Thank you Gorky. Happy that you like it.
LikeLike