Seed2Seed: Know your Kashmiri Rajma/Kidney bean through leaves and flowers.

The origin of rajma, also known as kidney bean, is Mexico. It was introduced to India by the Portuguese via Europe. Over time, the Kashmiri/Jammu rajma evolved from the regular kidney bean due to geographical and climatic conditions.
Kashmiri rajma, is smaller in size, brighter in colour, and tastier than the regular kidney bean. Although it’s a pulse, it’s used extensively in Indian kitchens, much like dal.
Rajma is a nutrient-rich food. Its scientific name is Phaseolus vulgaris. It’s an excellent source of protein, fiber, iron, and vitamins.
To get a glimpse of the plant’s life cycle, try sowing some rajma seeds and watch them grow. Observe the leaves and flowers as they develop.
Welcome to Seed2Seed!
In this project, we embark on a fascinating journey, sowing seeds and observing their transformation into plants. We’ll witness the seeds germinate, grow, and develop leaves, flowers, and fruits. Ultimately, these fruits will produce the same kind of seeds we started with.
But what exactly is a seed?
A seed is the embryonic stage of a plant’s life cycle. It’s a tiny, self-contained package that holds the potential for new life. A seed consists of three main parts:
1. Embryo: The embryo is the tiny, undeveloped plant inside the seed. It’s not visible to the naked eye, but it contains the genetic material necessary for growth.
2. Endosperm: The endosperm is the nutrient-rich tissue that surrounds the embryo. It provides the necessary nutrients for the seedling to grow.
3. Seed Coat: The seed coat is the protective outer layer of the seed. It shields the embryo and endosperm from damage and provides a safe environment for germination.
By understanding the structure and function of seeds, we can appreciate the incredible process of plant growth and development.
Is Rajma a Seed?
Let’s conduct a simple experiment.

- Soak a few rajma beans in water for a couple of hours. This will make them softer and easier to handle.
- Remove the rajma beans from the water and wipe them carefully.
3. Use a blade or pin to carefully remove the red skin. This is the seed coat.
4. Slit open the seed and observe the two fleshy, white, leaf-like structures. These are the cotyledons or seed leaves, also known as the endosperm. They contain the nutrients for the new plant.
What’s Inside?
Inside the cotyledons, there’s a tiny structure (not easily visible) that’s the future plant of the seed. This is called the embryo. (see the picture above)
Now that we’ve explored the internal structure of rajma and rajma fulfils all the three criteria of a seed, we can proceed with our experiment!
Seed2Seed
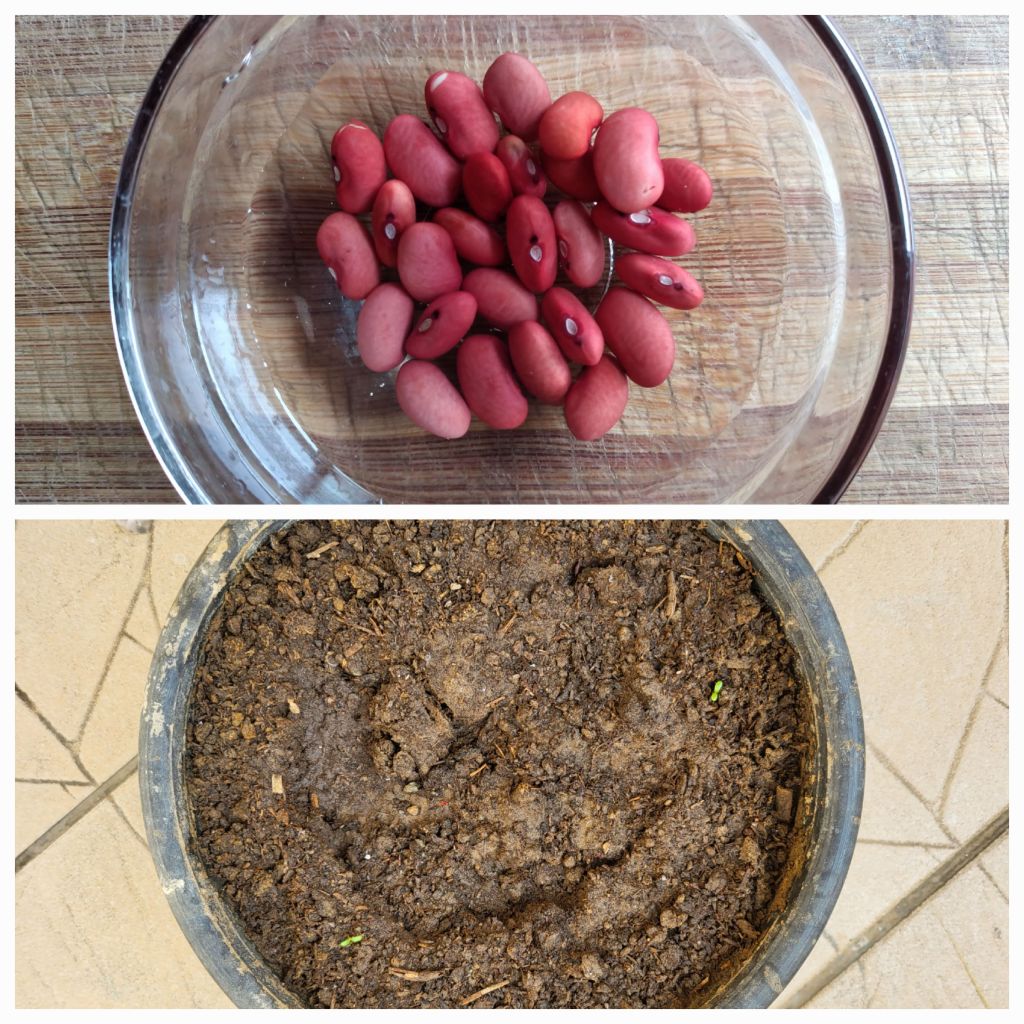
Prepared a pot and soaked few rajma seeds overnight. When the seeds absorb the water, the germination is activated.
Sow the seeds 2 cms below the soil and watered them sparingly.

After about 7 days, a white coloured hook emerged from the soil, which is called Hypocotyl.
What is Hypocotyl?
The Germination Process under the soil:
We planted a few rajma seeds in a glass container for you to make it easier.
When a seed is planted in the soil, it may seem like nothing is happening for a few days. But beneath the surface, germination has begun. The first visible sign of growth is the emergence of the radicle, the embryonic root of the plant.
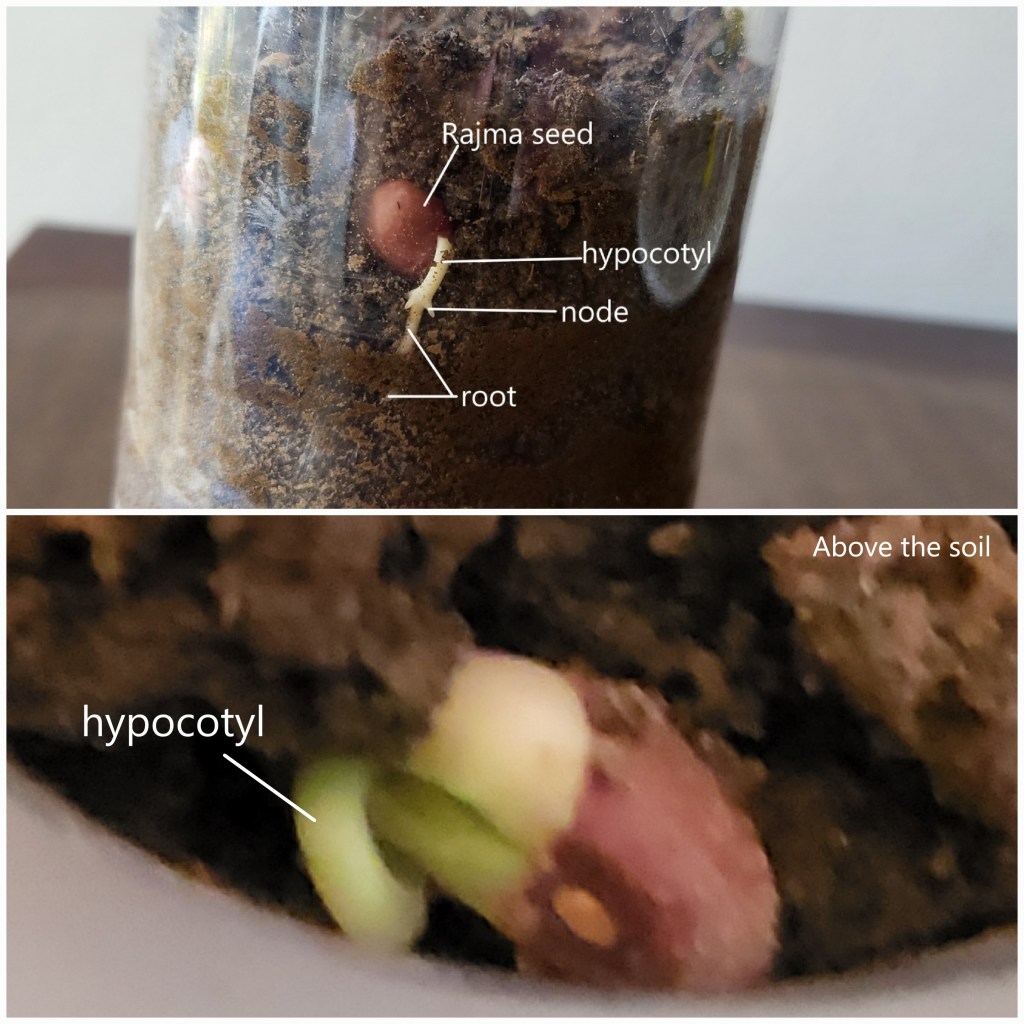
As the radicle grows downward in search of water, a node forms on the root from where a small portion begins to elongate and push upwards towards the light. This elongated portion is called the hypocotyl, marking the beginning of the seedling’s journey towards the surface.
As the hypocotyl grows, it carries the seed’s cotyledons and plumule upwards towards the light. Growing rapidly, the hypocotyl breaks through the soil surface, forming a hook-like shape while the seed remains underground. This distinctive shape earns it the nickname “plumule hook.”
Later, the seed emerges, still encased in its coat, with the cotyledons and plumule intact. As the seedling develops, the hypocotyl straightens and matures into the plant’s stem.
When the seed appears above the soil during germination it iscalled epigeal germination (epi = above, geo = earth).
Day 8: Germination Update

On the 8th day,a significant development occurred. The seed coat had burst open, revealing a glimpse of the plumule inside the cotyledon. The red seed coat was still partially attached, a reminder of the seed’s transformation.
The little rajma bean’s progress is adorable! Watching seeds germinate and grow is a magical experience.
Day 9: A New Transformation

Overnight, a magical change occurred! The cotyledons and plumules turned a vibrant green. As they grew, their names also changed. The plumules now became known as true leaves, while the cotyledons transformed into seed leaves.
Growth and Development
The Emergence of a New Plant
The hypocotyl is the portion between the root and seed leaves (cotyledons), while the epicotyl is the portion between the seed leaves and true leaves (plumule). True leaves are broader and heart-shaped. A stem bud emerged between the two true leaves.

The seed leaves provided stored nutrition to the new plant. As true leaves developed, they began to produce food for the plant. Meanwhile, the seed leaves shrivelled up. The young plant actively produced new stem and leaf buds.

Leaf Development
The first leaf that appeared was a 3-lobed trifoliolate leaf. Trifoliolate leaves have three leaflets attached to a common stalk.
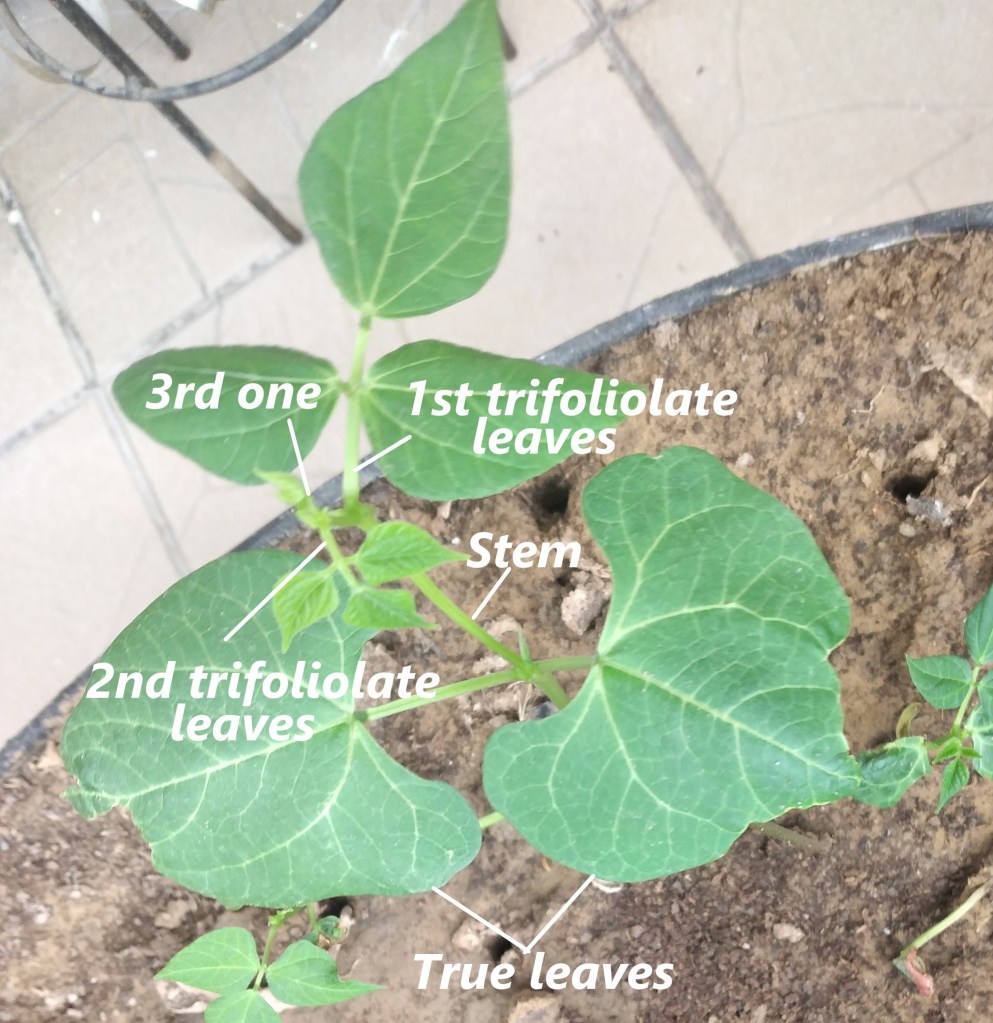
Leaves continued to appear on the stem, growing into a beautiful plant.
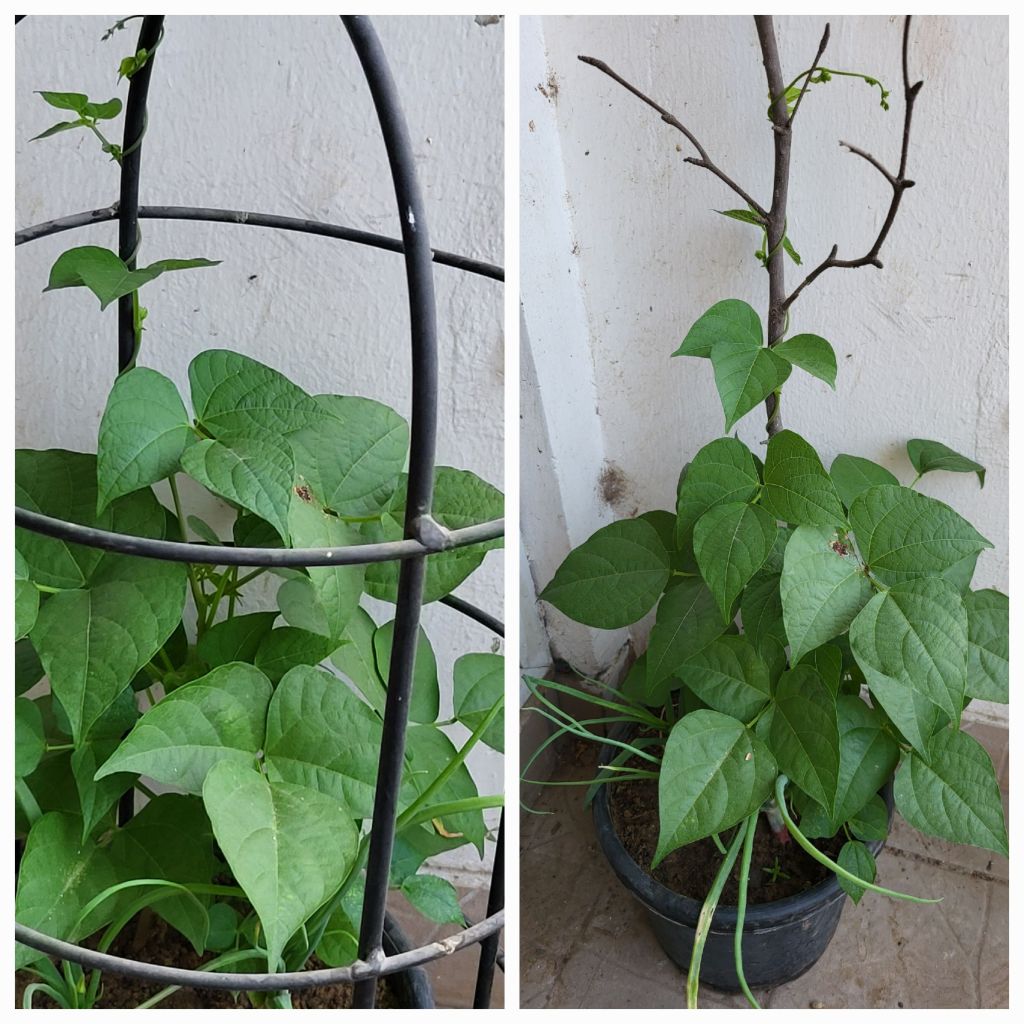
Support and Protection
To protect the plant from pigeons, we covered it with an iron frame. As it grew, we removed the frame and supported the plant with a twig.
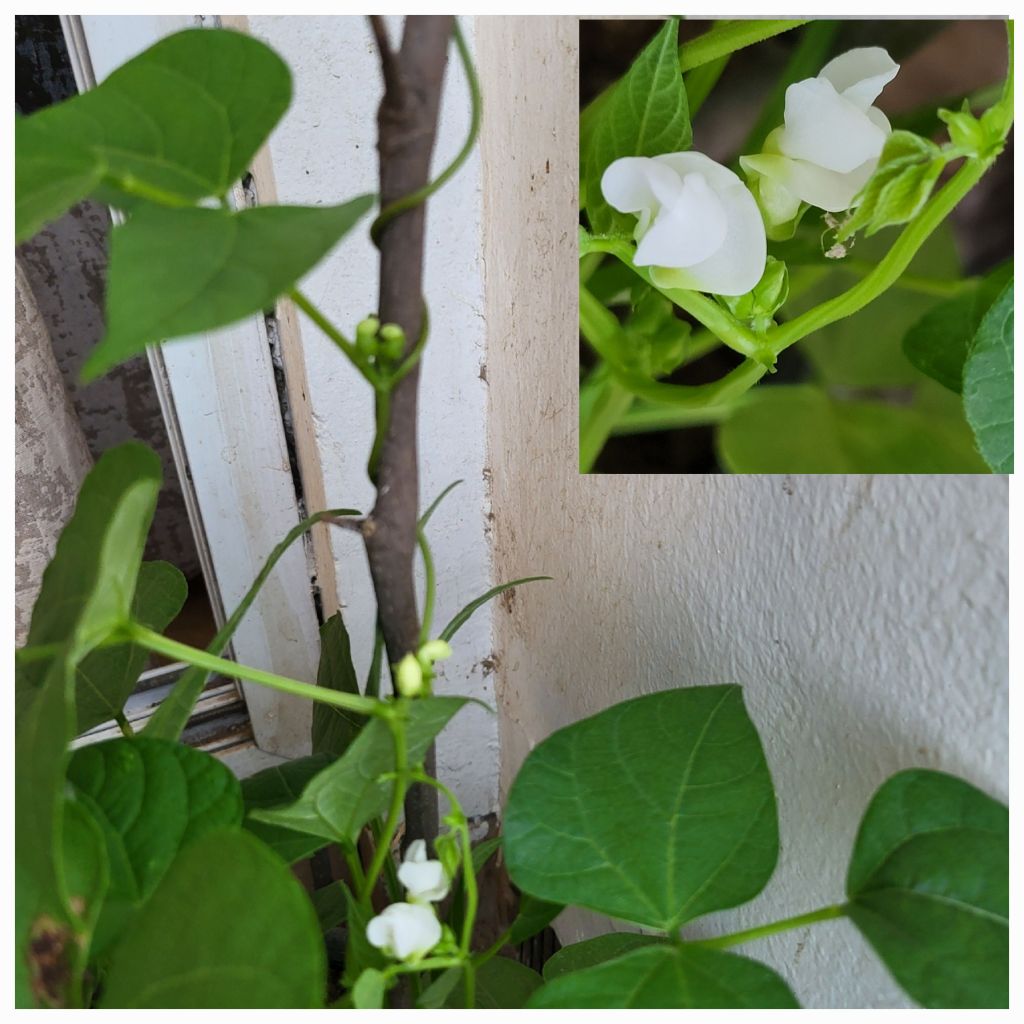
Flowering and podding
Beautiful white flowers adorned the plant, followed by more flower buds.
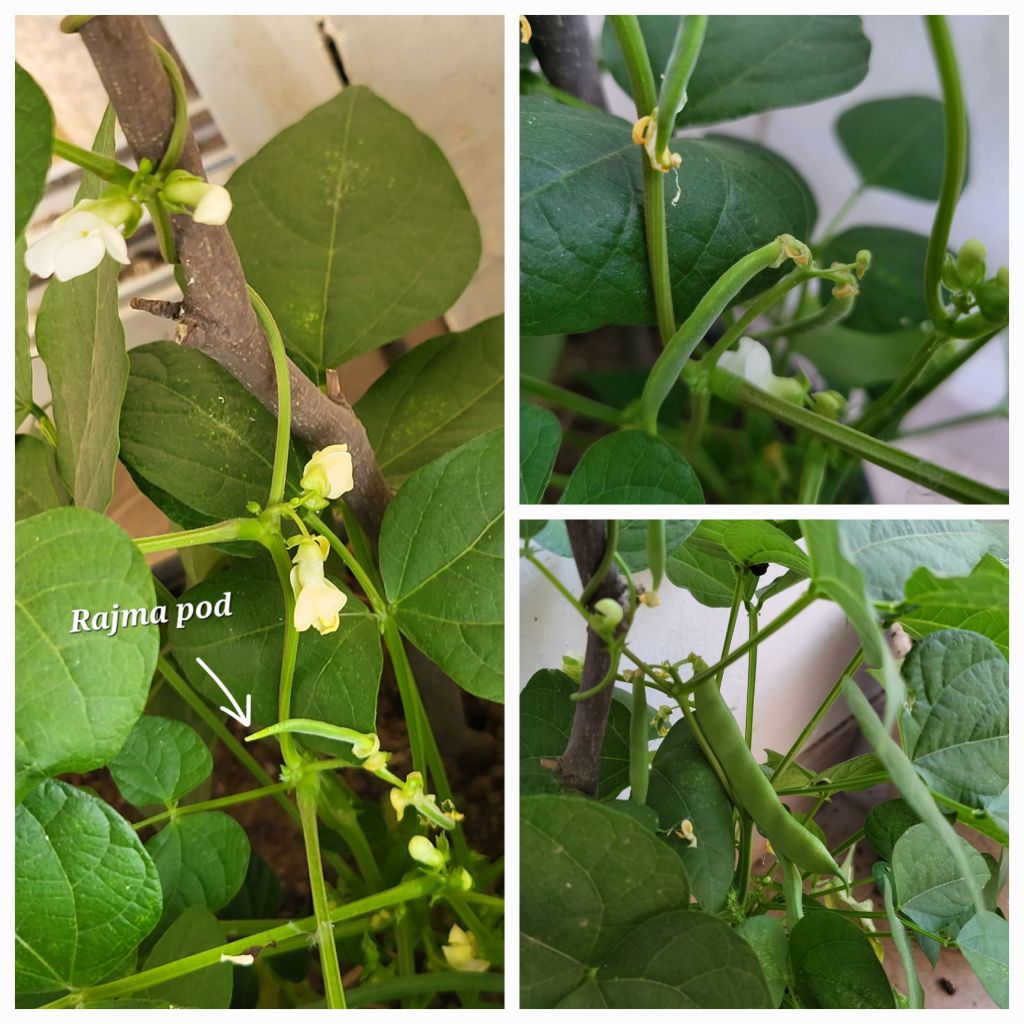
The first rajma pod appeared after 3 days, and soon more pods emerged. The base of the plant branched into several branches, promising a bountiful harvest.
Seed Development

At this early stage, the pod is difficult to open. It is tight squeeze. Upon closer look, we can see that only two seeds have begun to develop, while the others are still waiting to emerge.
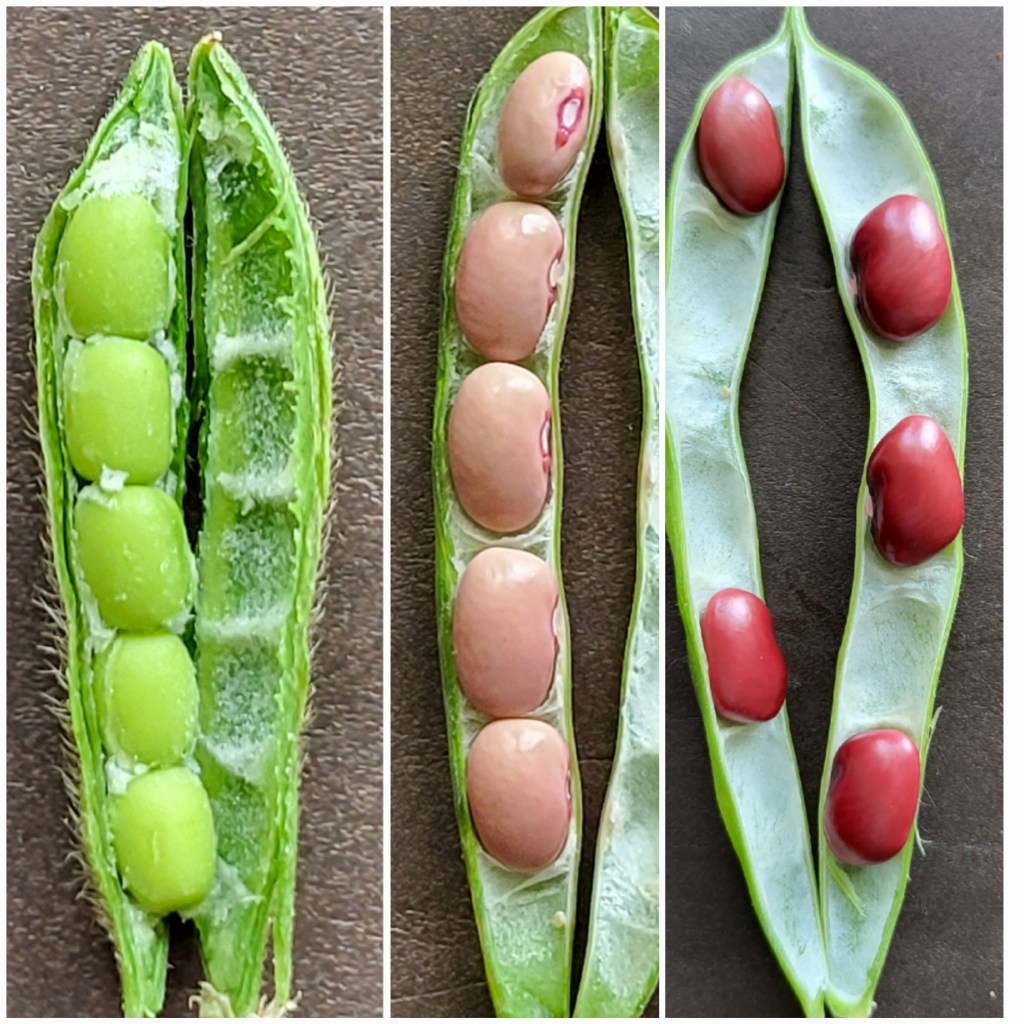
As the seeds mature, they fill the pod and undergo a colour transformation:
1. From green to pinkish hues. 2. Eventually turning bright red.
Take a look inside the rajma pods! You’ll find 5-6 seeds attached to the inner curve of the pod, where they receive nutrients and grow.

We carefully removed the pods, extracted the seeds, and revealed the beautiful, red, gem-like seeds.
A Speedy Harvest!
Typically, rajma plants take around 4 months (100-140 days) to mature from seed to harvest. But our little plants grew and reaching harvest readiness in just 95 days!
Happy reading!
*******

It’s very informative. We use the Rajma but never think how it grows. Liked it very much. Thank you. Keep posting!
LikeLike
Glad you found it informative and interesting! Rajma is indeed a staple in many cuisines, and it’s fascinating to learn about its growth process. Thanks for reading!
LikeLike
Wow! Very interesting! Thank you for taking us through the journey and transformation of rajma seeds!
LikeLike
very informative! Visuals are excellent too!!
LikeLike
I really enjoyed reading about the journey of growing rajma from seed to seed! It’s fascinating to see the entire lifecycle. Thanks for sharing such valuable insights!
LikeLike
I’m thrilled you enjoyed the journey! Growing rajma from seed to seed can be such a rewarding experience. Thanks for following along Protima!
LikeLike