Hi,
We are here again with another episode of Seed to Seed: Know your Masoor dal/ Pink lentil through leaves and flowers.
When we talk about masoor dal/ Pink lentil, immediately the pink colour comes to our mind. This is because we use the polished or split masoor dal more often than the whole unpolished dal.
Once a young girl called up her mother in India and sadly said, “Mom, today I cooked Masoor dal but could not keep its colour”.
Masoor dal is a popular dal. Widely uses and it is nutritious

Masoor dal is available in the market in 3 forms :
Whole with skin, skinned whole and skinned and split.
Whole with the skin is kown as Sabut masoor in Hindi and Brown Lentil in English.
Both skinned whole and skinned split are known as Masoor dal in Hindi and Pink Lentil in English
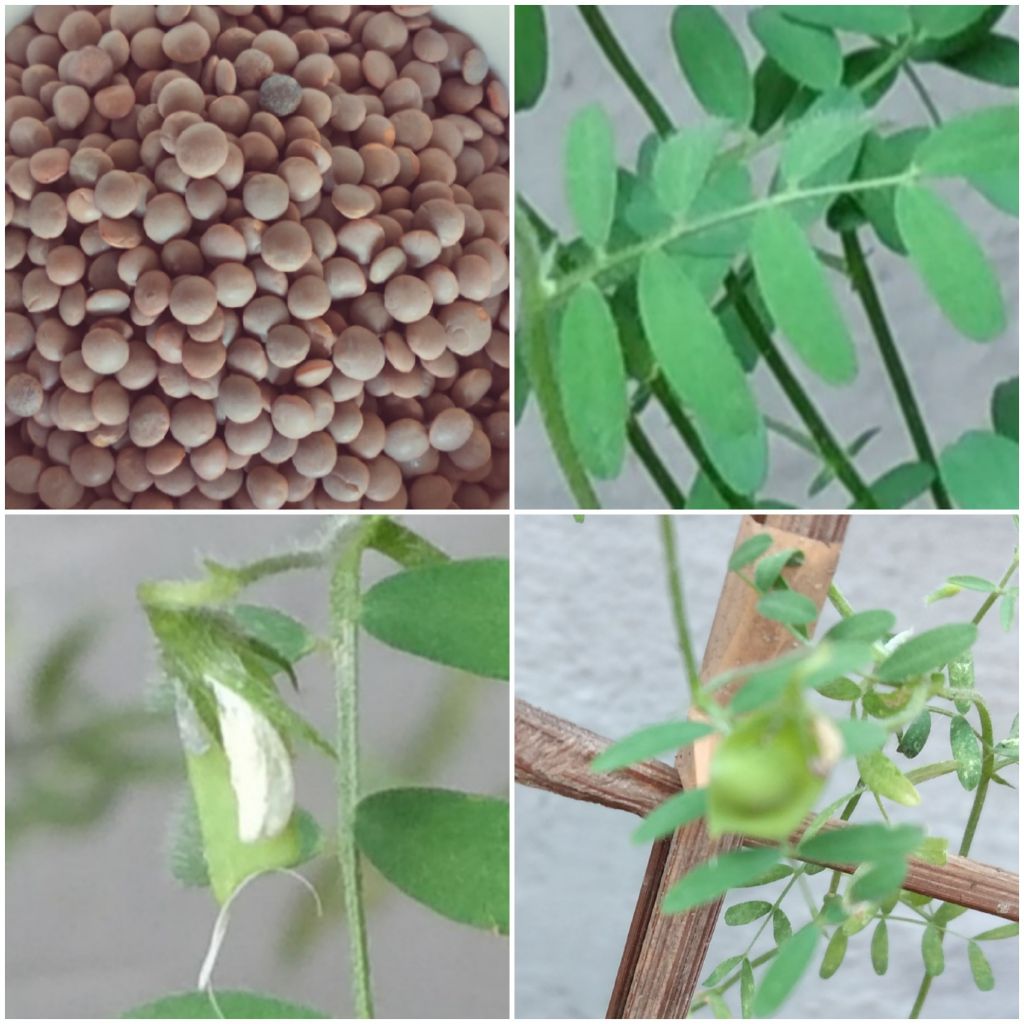
Sabut masoor/ Brown lentils have all the characteristics of a seed. It has a brown skin which is called the coat, two pink colours halves called the cotyledon. The embryo is in between the cotyledons which cannot be seen with our naked eyes. The embryo is the tiny plant which eventually becomes the plant under favourable conditions.
A whole masoor without the skin is an unprotected seed. The probability of not getting a plant is much more than getting one. In split masoor the embryo, the tiny plant is destroyed so you can never get a plant out of it.
Masoor is a winter crop. When we started the project it was monsoon. The whole idea of the project was to know more about each dal. Plants and leaves are good enough even if we not see the flowers and the seeds. We can always do it again in winter.
We sowed few masoor seeds and watched as they grew.
Experiment 1

Soaked a few whole masoor seed/ Brown lentil for about 4 hours and prepare a pot for the seeds.
Sowed the seed and covered with 2 cm of soil and watered sparingly.

For few days there was nothing visible on the surface of the soil.
But the seeds inside the soil were busy preparing themselves to grow into plants.
The seeds absorbed more water from the soil and swell up. The coats broke open. The roots were the first to come out of the seeds. They went down into the soil in search of water. The shoots moved upward in search of sunlight.
To see all those changes, we did a second experiment which is the experiment 2.
Experiment 2
The day we planned to sow the seeds, we also prepared a drinking glass with soil leaving about 2 cm from the top and watered it sparingly.

On 1st day, placed 3 seeds far apart and covered them with soil to the brim of the glass as shown in the picture.
On 2nd and 3rd day nothing was visible through the glass.

On 4th day one of the seeds could be seen clearly with its shoot going up and a small part of the root going down.

On 5th day , the shoot almost reached the top but its root was not visible.
In another seed, the root was visible and it reached the bottom of the glass.
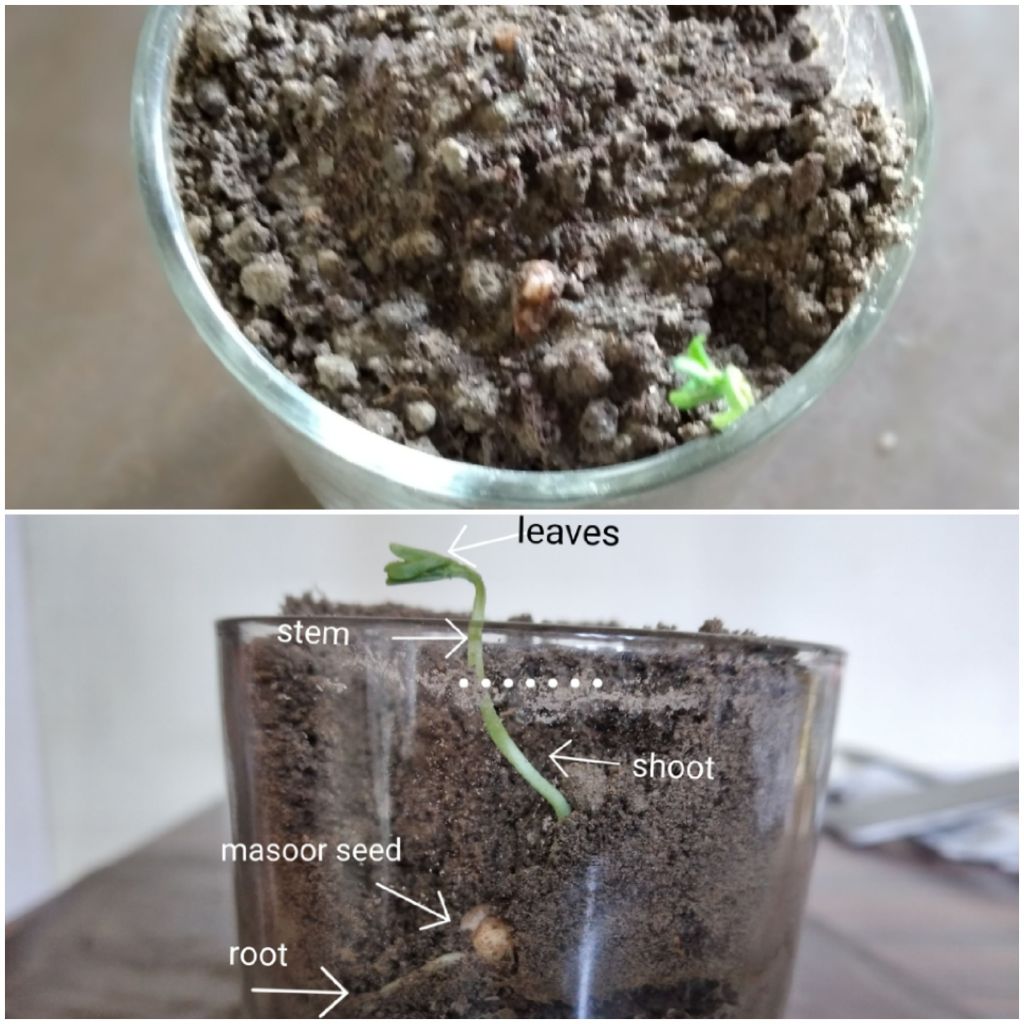
On the 6th day the shoot emerged from the soil. The top picture is the view of the plant from top.
In the picture below, we dug out little soil to show you the position of the seed, the root , shoot and the stem with leaves above the soil.
When the seed remains inside the soil and nourishes the plant during germination, then it is called hypogeal germination.
In Experiment 2 we saw the germination of the seeds inside the soil. Now we will go back to Experiment 1 and follow the growth of the plant in pot from where we left.
Experiment 1 continuing ……

On 5th day there was nothing visible on the surface of the pot.

On 6th day green shoots appeared in the pot with unfolded leaves.
Once the leaves are out the plants grow fast. They no longer depend on the cotyledons for their food. The leaves prepare its own food with the help of sunlight which is called photosynthesis.
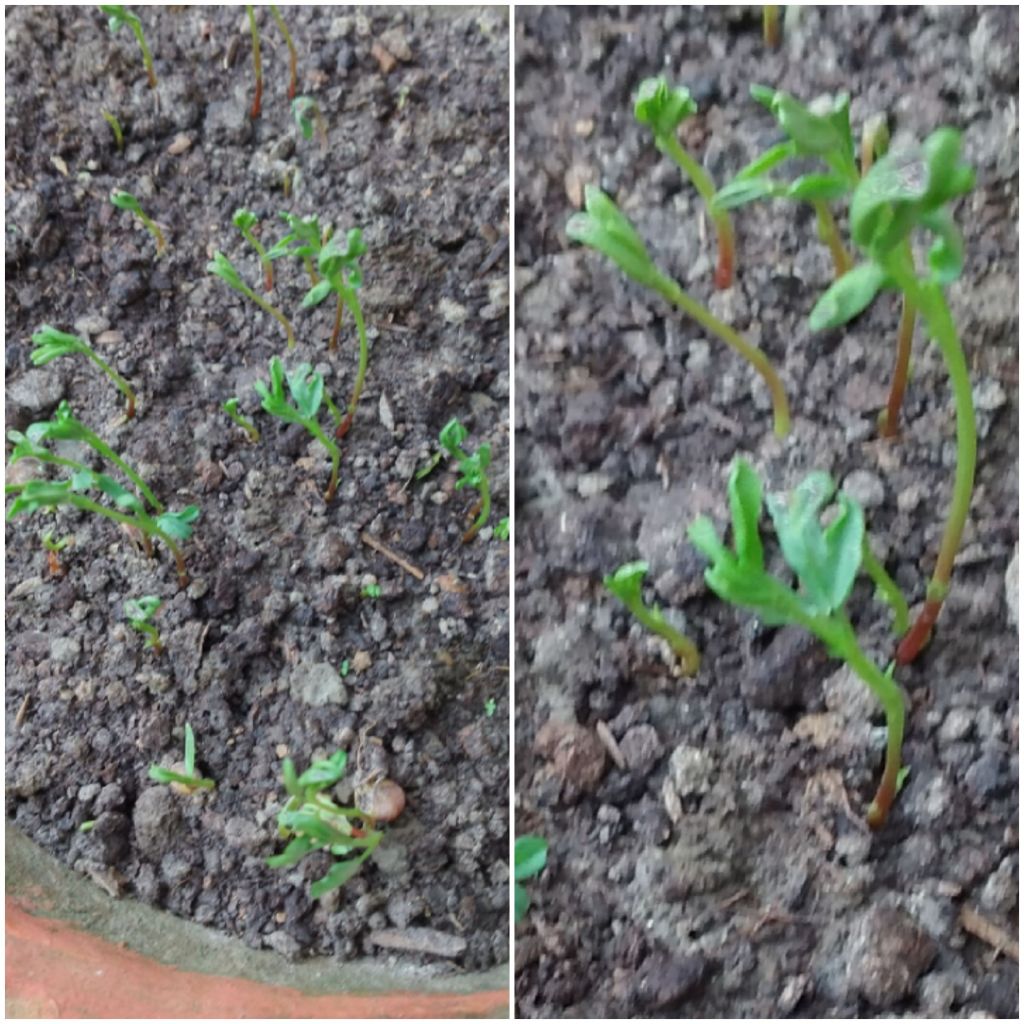
The picture on the left shows the shoots with unfolding leaves.
Right hand side picture gives an enlarged view of the leaves.

By 9th day, the plants became taller and leaves were more prominent. Leaves were coming out in pairs instead of a single leaf from the stem. Such leaves are called compound leaves.
So Masoor dal has compound leaves.
(The picture on the right is just an enlargement of the picture on the left.)

By 11th day the plants were already 10.5 cm tall and every plant had at least 3 alternate pairs of leaflets.
To make it visible, a white paper was placed behind.

On 12th day, in few plants 2 pairs of leaflets appeared.

After 14 days most of the leafstalks had 2 pairs of leaflets.

In that way every day the height of the plants increased.
Finally, on 30th day all the plants had 3, 4 and 5 pairs of leaflets clearly showing the shape of the compound leaf.
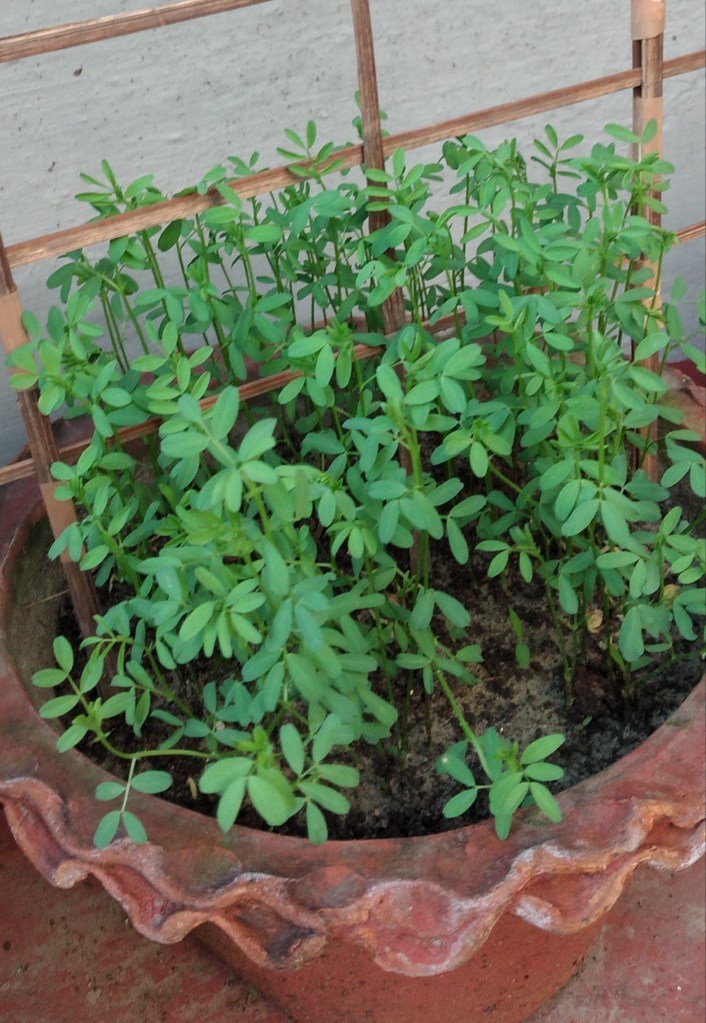
The plants were growing well. They were bushy herbs with slender stems.
The pot became crowded.
Made a bamboo support to keep the plants upright.

Soon weeded a few plants so that the remaining plants could grow more freely.

The plants were 45 -47 days old and about 21 cm tall when the first flower was noticed.
We were so happy to see the flower.
The flower could not be focused well. The flower was white in colour. It rose from the point between the leafstalk and the stem.

A few days later, more flowers were seen.
(Flowers are shown with arrows in the left hand picture.)

Each rose from the point between the leafstalks and the branch.

About 6-7 days later, we saw a little pod. One of the flowers had turned into a pod.
The pod is shown in the picture with an arrow head.
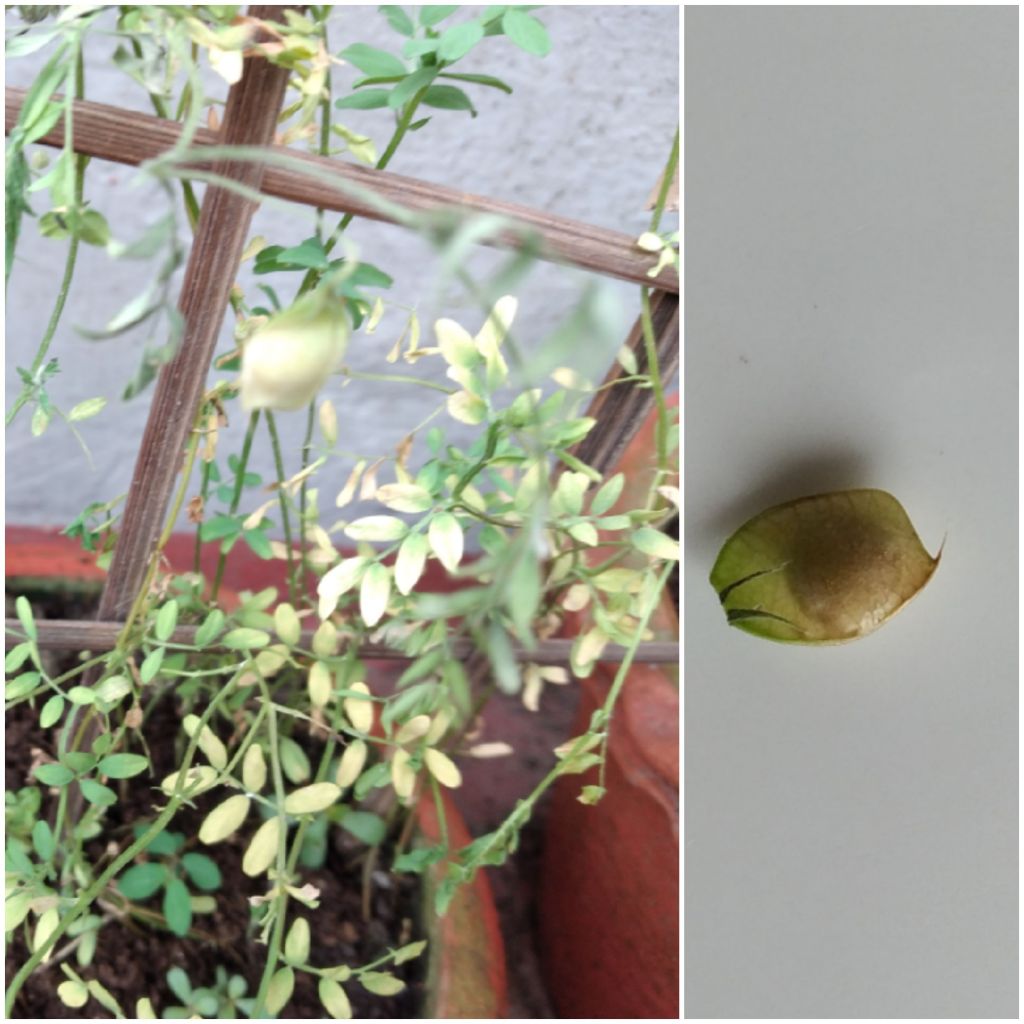
We left the pod on the plant for about 8 days to mature. No other pods were seen. The plants began to dry up.
Plucked the pod carefully from the plant and allowed the shell to dry up thoroughly.
When a plant flowers and gives its fruit as pod, then the plant is called leguminous plant.
Therefore, masoor dal plant belongs to the legume family.

After 10 days removed the shell and placed seed on a plate.
It was shinning like a little diamond.
Who could ask for more?
The pod was about 1.1 cm. It contained a single seed of 0.4 cm. It was brown in colour.
It took 65 days for masoor dal/Pink lentil to complete the story of seed to seed.
Masoor dal is a winter crop.
We started the project during monsoon. Considering that it was a good harvest.
Anyway we will sow it again in November-December and keep you posted.
Did you know masoor dal is used as face mask ?
If you have come so far, please leave your comment or suggest. Thank you.
Keep reading ……..

Great going!
LikeLike
Thank you Koustuv.
LikeLike
Hats off on your hard work and dedication
LikeLike
Thank you Protima. Please keep reading .
LikeLike
Very informative…Good work 👍
LikeLike
Thank you Naba. Keep reading ….
LikeLike