
Hi,
This was a small project – know your dal through leaves and flowers, where we sowed few common dal seeds and watched as they grew.

Let us find out more about Moong dal. Moong dal is available in the market in three forms. It is nutritious, easy to digest and versatile in use.
The whole moong dal with the skin is known as sabut moong in Hindi and Green gram in English. Split with the skin on is known as chilka moong in Hindi and split Green gram in English. The split moong without the skin is known as moong dal in Hindi and yellow lentil in English.
To get a plant we need a seed. Among sabut moong, chilka moong and moong dal only sabut moong fulfils all the all the criteria of a seed.
In a sabut moong, the olive green skin is its coat, the two yellow halves are the cotyledons and in between the two cotyledons there is an embryo which we cannot see with our naked eyes. Embryo is the tiny plant that grows under favourable conditions.
When a green gram is split the embryo gets destroyed. Therefore you cannot get a plant out of a split dal.
The best time to sow Moong dal/Green gram is at the beginning of the rainy season (Monsoon) in India and the crop will be ready for harvesting within 90- 100 days or even less.
We started the experiment just before monsoon. As they say right place at the right time.
The Experiment: 1
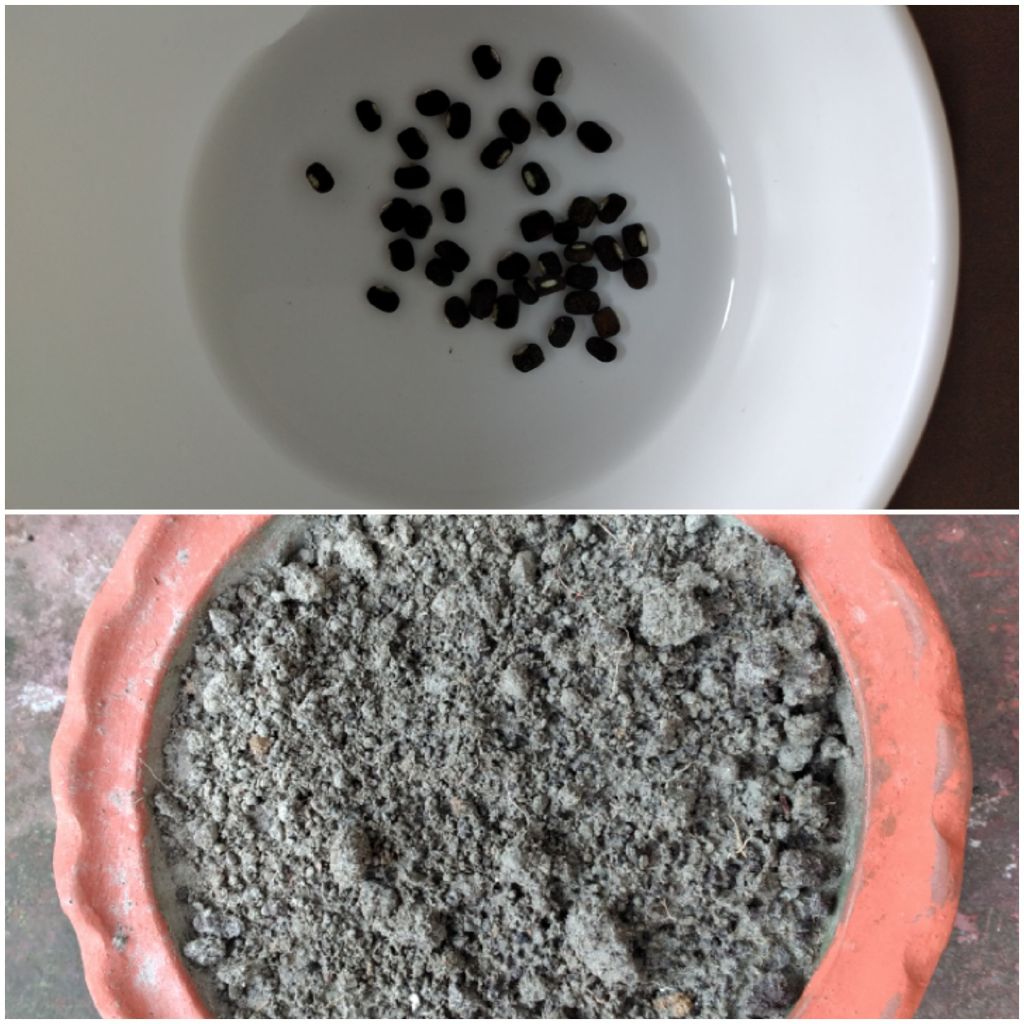
Prepared a pot for the plants and soaked a few moong dal seeds for about 4 hours.
The purpose of soaking was to hasten the process of germination.
After 4 hours sowed the seeds in the pot about 2cm below the surface of the soil and watered it sparingly.

For few days there was no sign of the seeds. Everyday watered the pot lightly to keep the soil moist.
From the time of sowing to the 3rd day what actually happened to the seeds inside the soil. Were the seeds sleeping or going through the germination ? To find that out, we did another experiment.
We called this Experiment 2:
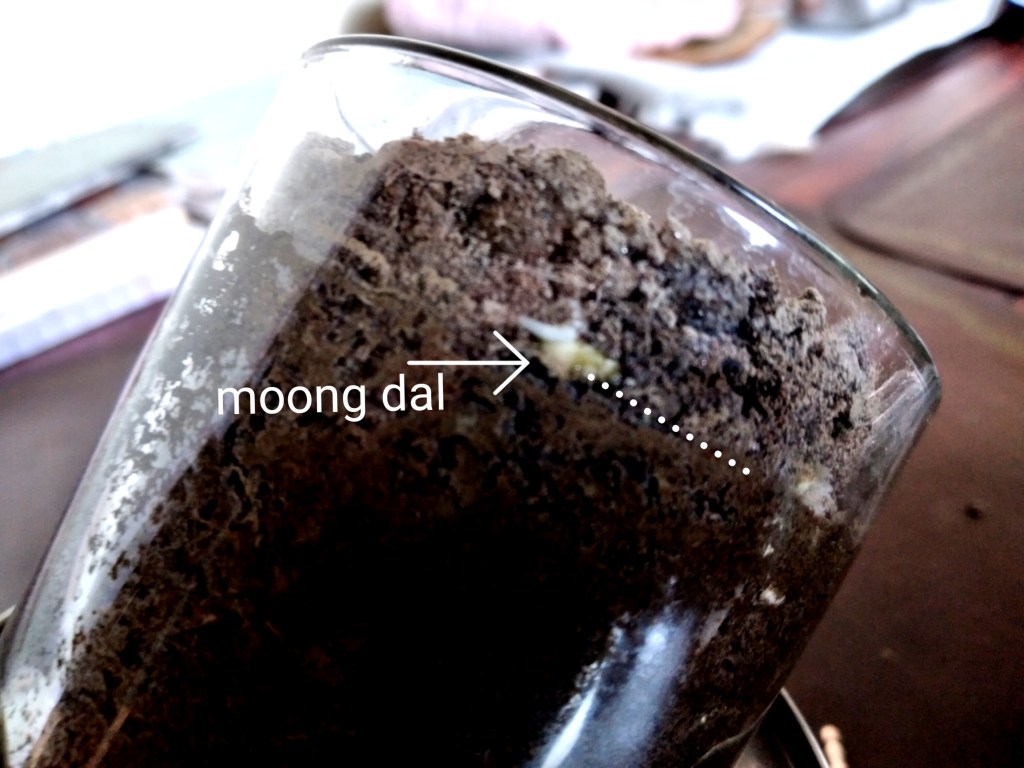
On the 1st day just like before we soaked a few Green gram for about 4 hours. In the mean time filled up a drinking glass with soil to 2 cm from the brim of the glass. We sprayed water lightly just to moisten the soil. Next placed the soaked seeds close to the side touching the glass surface and filled it up with the remaining soil. The dotted line was the position of the seed.
On the 2nd day seed coat burst. Since the picture was taken through glass it was not very clear.

On the 3nd day, the seed changed a lot. It had a long root about 6 cm and a short stem with the cotyledons. (Cotyledons are the 2 parts of the seed.)

On the 4rd day , the root went right down to the end of the glass, bent and grew about 3 cm more which was seen from the bottom of the glass giving a total length of 11 cm.

Seed or rather the cotyledons have moved upward from the dotted line to the surface of the soil.
So, the seeds were busy going through the different stages of germination. Absorbing moist, bursting of coats, roots going down and shoots pushing themselves up in search of sunlight.
During germination when the cotyledons emerges to the surface of the soil and behaves like leaves such germinations are called epigeal.
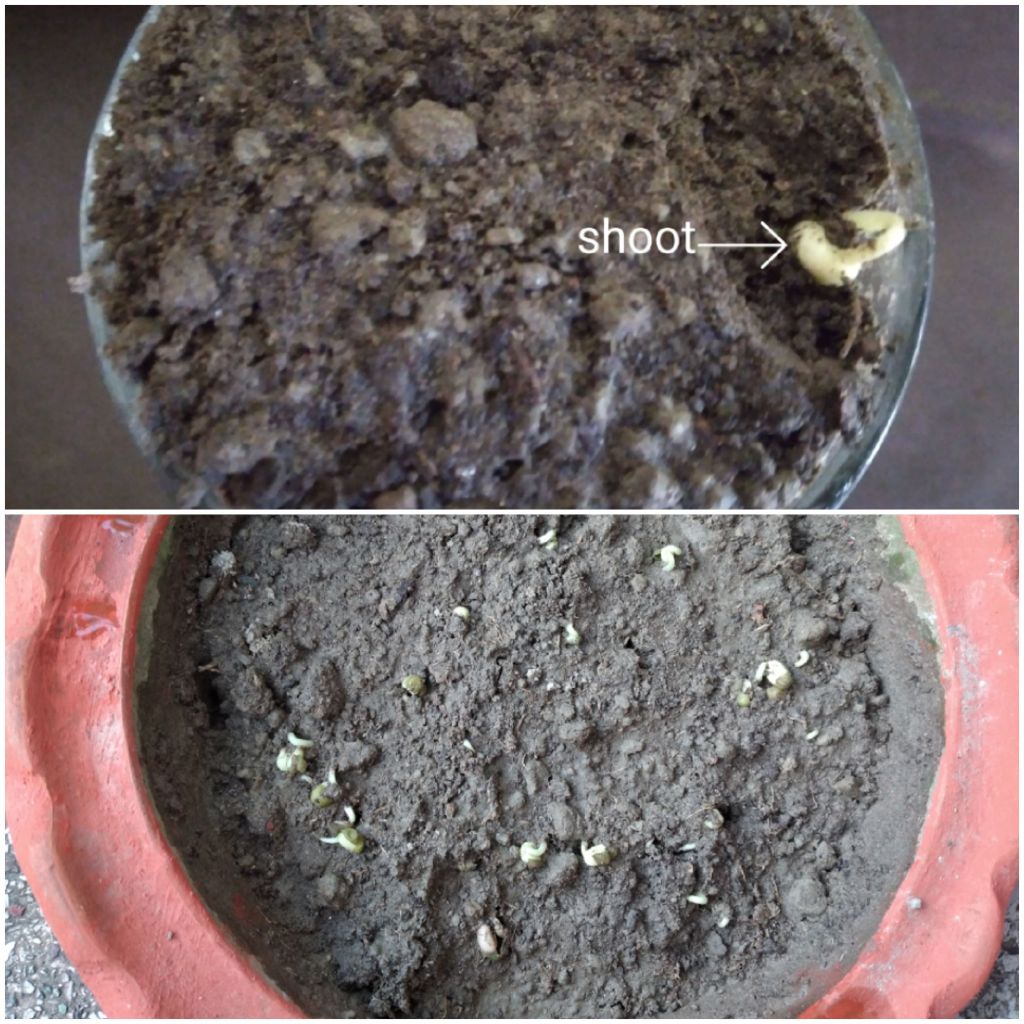
So on 4th day, both in the glass as well as in the pot the shoots emerged above the soil with the cotyledons.
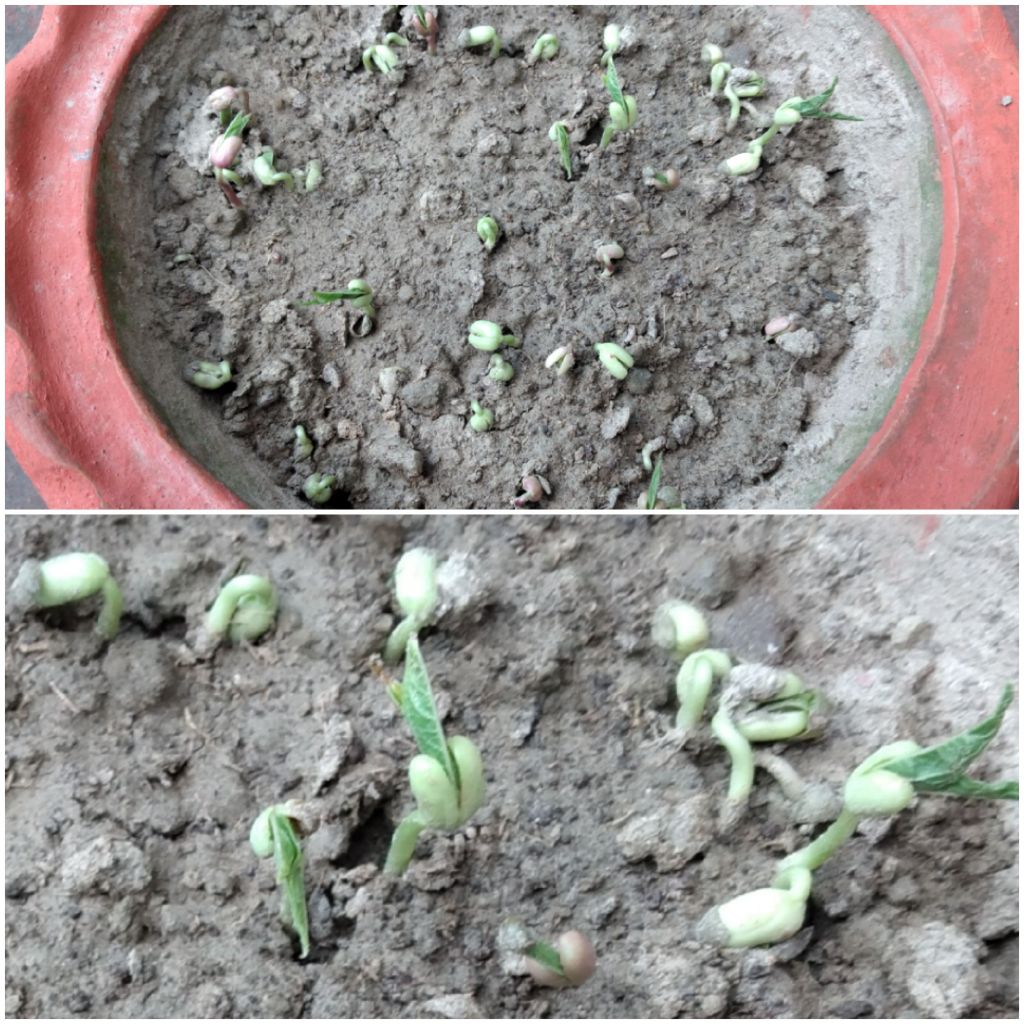
Now back to the original Experiment 1:

On 4th day. The shoots emerged to the surface of the soil with the cotyledons.
At this stage the cotyledons play a very important role. They supply nutrition to the growing plant just like leaves. So such cotyledons are known as seed leaves.
(The lower picture is an enlarged view of the emerging cotyledons.)
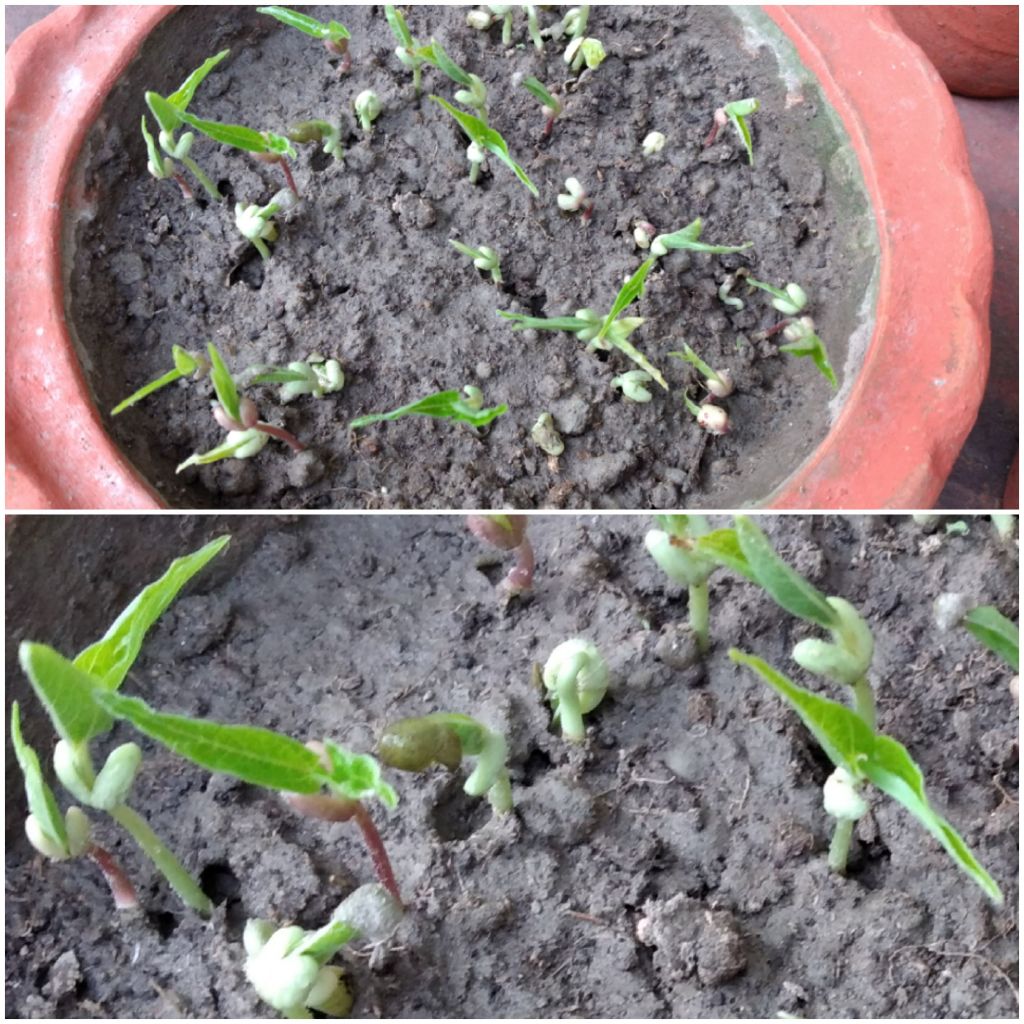
On 5th day green leaves were noticed along with the cotyledons.
The picture below is an enlarged view of the above picture.
The first pair of green leaves is called true leaves.
On 6th day the green leaves became more prominent.
Once the green leaves are out, the plants are cable of producing their own food with the help of sunlight.
The process of preparing food by the green leaves with the help of sunlight is known as photothynthesis.

About 10 days later the plants became taller. The cotyledons were still hanging on to the plants. Their function was over. They will fall off in their own accord.
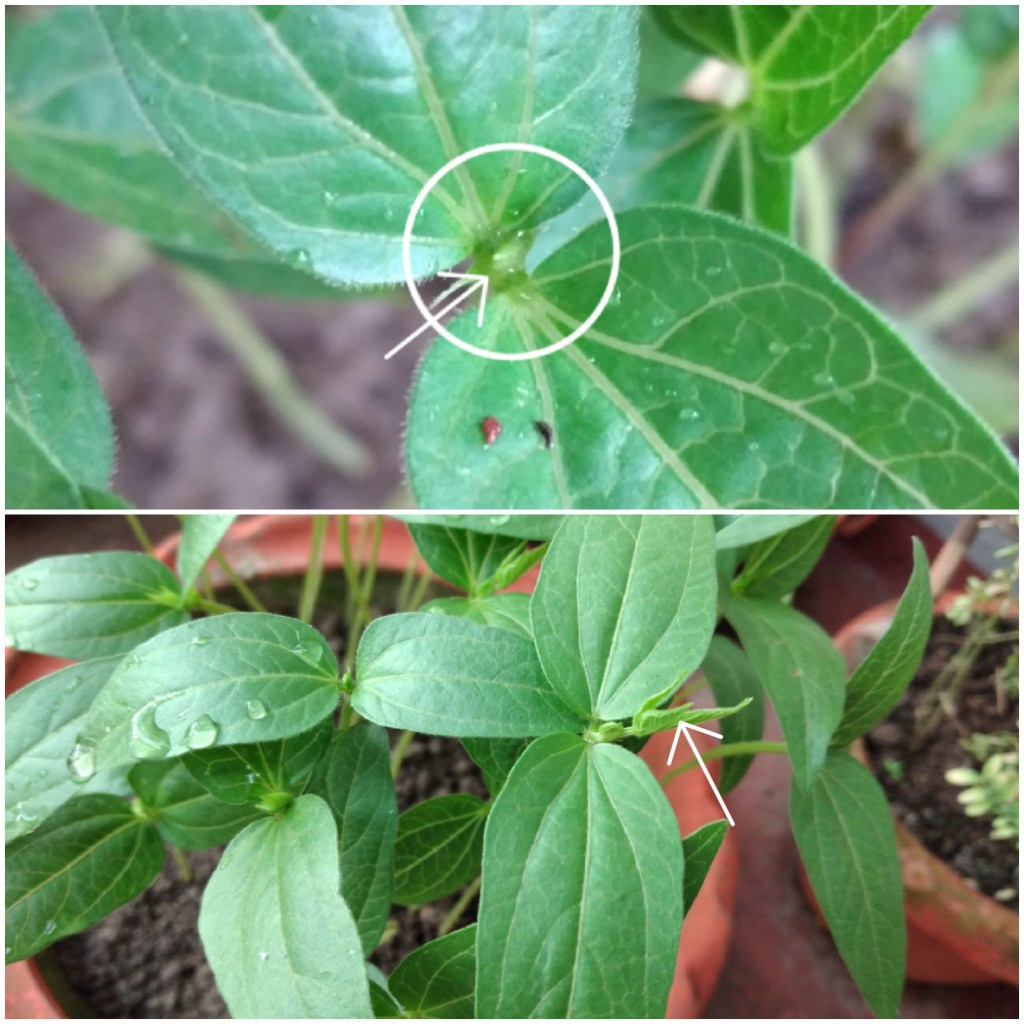
15 days later small buds were noticed in between the true leaves in all the plants.
The picture below shows the buds enfolded into small leaves. Each leaf consisted of three tiny leaflets.
When a leafstalk has more than one leaf then it is called a compound leaf. So Moong dal has compound leaves.

The plants grew very fast. Within a couple of days the first compound leaves became big.
From the base of each compound leaf the next set of shoot and leaf bud appeared. Soon that too matured into another compound leaf.

By the time the plants were 30 days old, each plant had 2 or 3 compound leaves and plants were about about 34-35 cm in height.

After 40 days, a tiny flower bud appeared.
The top picture shows the first flower bud.
The bottom picture shows a beautiful yellow colour flower bloomed from the bud the following day.

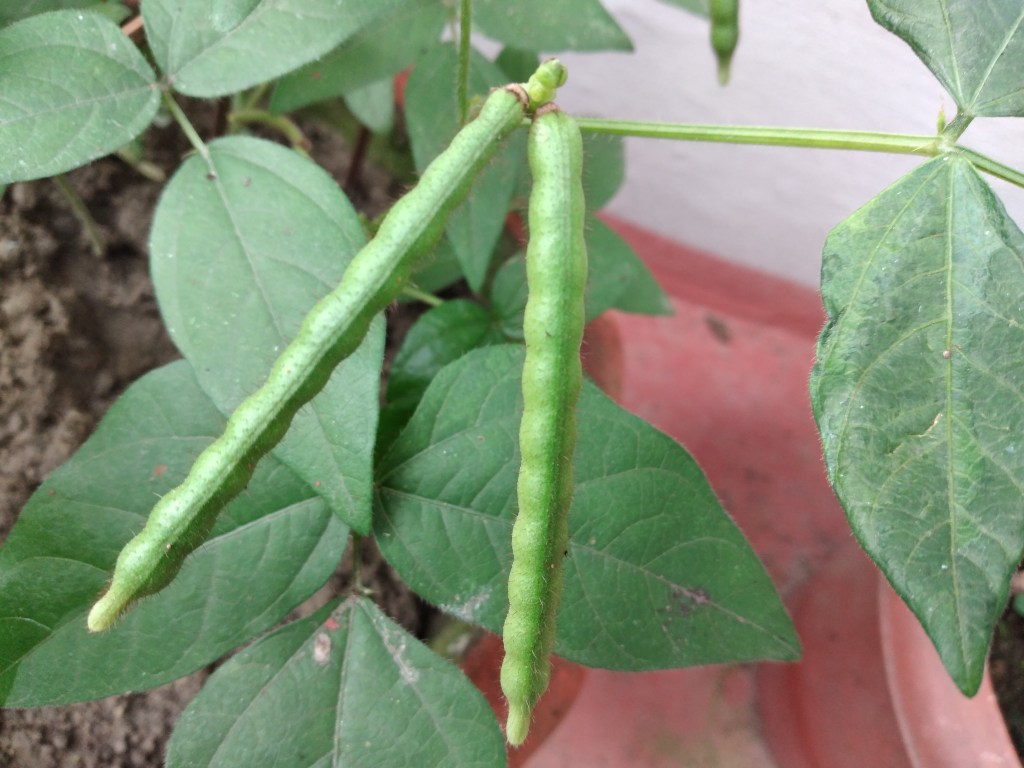
2 days later a smart pod was seen in place of the first flower together with another new flower.
When a plant bears flower and pod as its fruit, then it is said to belong to legume family.
So Moong dal belongs to legume family.

One of the fully matured plant in the pot shows the plants had 4 compound leaves, the ‘true leaves’ were still there and its height was about 44-45 cm tall. The leaves are marked as 1,2,3 and 4. The flowers come out from the base of the last leafstalks.
The ‘true leaves’ were beginning to wither.

After a day or two the pod became bigger. It is green in colour with fine hair on it. And a new full bloom flower stood by it.

One day few leaves began to curl up and the back side began to turn brown. It looked diseased. I consulted a gardener. He gave me a bottle of tobacco water to spray on the leaves.

Tobacco water was sprayed for 2 days.
(Few pieces tobacco leaves soaked in water overnight. Next morning he filtered the liquid. That was his remedy.)
The tobacco water worked. The pods began to mature. The seeds were visible from outside.

Soon one of the pods began to turn yellowish. I was worried thinking it may dry up and fall off.
The next day, the same pod became blackish brown. I was thrilled.
This is the moment I was waiting for!
The pod should become blackish brown.

Gradually, the green pod turned to blackish brown.

Allowed the pod to mature for a few days on the plant then made my first harvest after about 65 days. Wonderful !
Kept the pod for 2 more days for the shell to dry up and then open it carefully to let the precious seeds to be displayed on a plate.

Day by day more pods turned yellow and then blackish brown. Collected all the pods and let them dry. To me it looked like beautiful harvest on the plate.
This is the story of Seed to Seed of Moong dal/ Green gram.
I am happy I could show you the complete life cycle of the moongdal/ Green gram .
Hope you enjoyed it as much as I enjoy nurturing the plants.
Please write your comments and suggestions. Thank you.
